Driving in London is an experience, as well as a bumpy ride. It is bumpy due to the legal climate that Uber is facing at the moment in London. While Uber can drive in London until the courts decide Uber’s fate towards June/July this year, taking on a long-term commitment is an issue for many new drivers, especially those that consider leasing or buying a vehicle for this gig income.
Taking into account the unsure future of Uber in London, if you decided to drive for Uber, then just know that the app itself is easy to use.
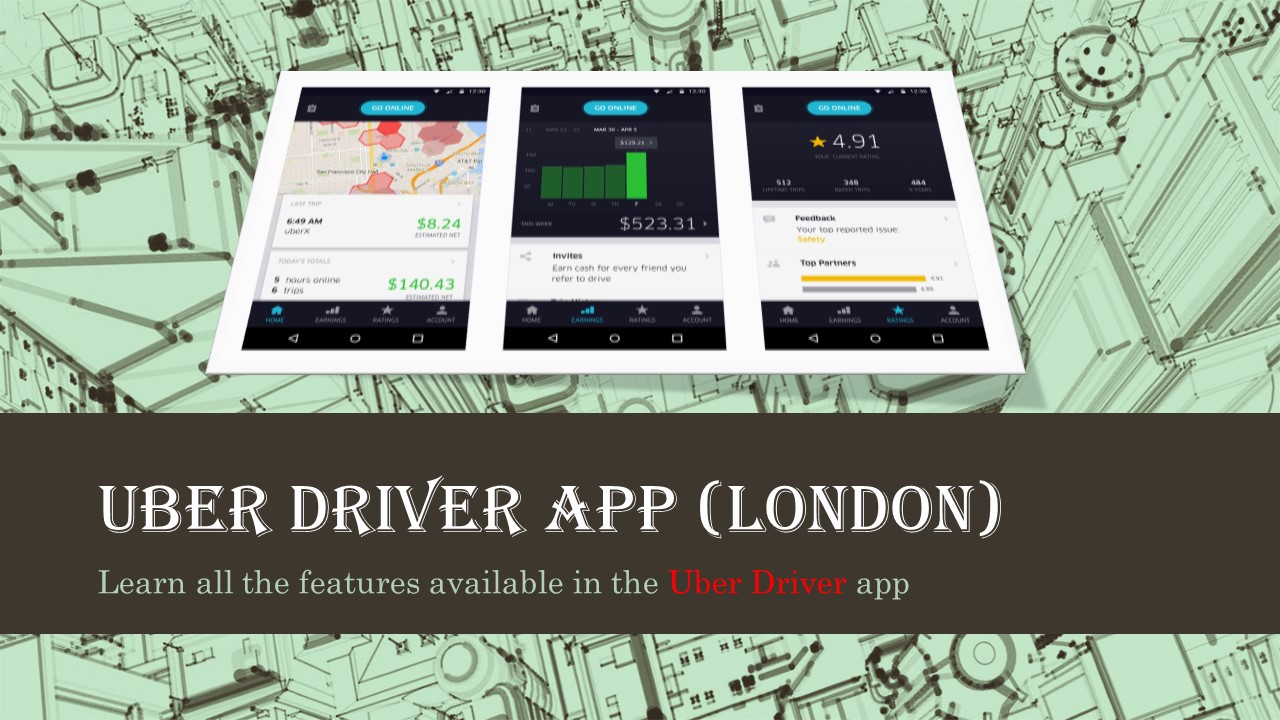
Once you have successfully applied to drive for Uber and received your app access, it is time to drive. Knowing your app is key to a successful driving experience.
Let’s take a quick peek at the app:
-
Starting
When you want to start a schedule, you obviously turn the app on. Every time you want to either take a break (receive no requests), then turn it off. -
Ride Requests
Once your app is on, you will be pinged. This means you will start to receive requests. Don’t immediately tap and accept every ride, check to see where the pick up is and where is the destination.- While not accepting rides is an issue with Uber and is part of their driver rating process, where too many unaccepted requests or cancellations are racked up against you. It is still your option to decide whether you accept the request or not. If you don’t accept the request, it will be transferred to another driver.
- If you accept the request and it is canceled, you will be paid a cancellation fee. If you cancel the request for whatever reason, it will be used as a factor in the driver acceptance ratio; once this goes beyond a certain threshold, you will be deactivated.
- Accepting a trip is simple, just tap the screen and you will start to drive to your waiting passenger.
-
GPS Navigation
Either use the app map or supplement it with Waze or Google Maps or any other GPS navigation map you prefer. If you are unsure where your passenger will be waiting, you can contact them to discuss the exact location. On some occasions, the customer will call the driver to explain where they will be waiting, which might be different to the location on the screen. So long as it is in the general area (up to 200 feet in any direction) don’t cancel the ride. However, if the location of the pick up is nowhere near the location of the passenger, you can cancel the ride and make a note that the reason was due to misrepresentation of the pickup location.- You are not paid for period 2 which is when you drive to the pick-up location. This is the reason you can cancel a request in such an instance.
- As you approach your destination, the app will start to send you new requests based on your location. This starts the process all over again, and by seamlessly accepting rides, you actually maximize your daily efficiency and income.
-
Hot Spots and Incentives.
The app shows a “heat map” as well as provides the occasional incentive (guaranteed income). So, make sure you ware watching the map screen and notices for ways to increase your income. However, don’t become a hot spot hound, you end up losing all the income from standard rides when waiting or chasing hot spots. -
Rating and Tipping
The tipping screen comes after the passenger rates you screen. So, make sure you give a great ride experience. On many occasions you will not know if you were tipped, you will have to rate the passenger before you can accept the next ride, so rate them according to how you experienced the ride and not on your expectations of a tip.- Passengers also have ratings, and you can see when you are going to pick up a passenger that has really bad ratings. You can also cancel a request if you don’t like the passenger’s ratings on screen, but don’t use this reason too many times.
- The passenger rating screen also provides comments that drivers can access and read what complements or criticisms passengers gave them. This is anonymous, so drivers do not know who ranked them 5 stars and who didn’t. When a passenger rates a driver under 5 stars, they must provide a reason.
-
Tracking your Income
The Uber app racks your income and miles per period 3. This means that not all your miles are tracked While you can get an accurate picture and detailed description of all miles and hours worked you do not track all your miles and expenses via the app.- Make sure you have a good mile tracking app as well as a good expense tracker. Make sure you include all your expenses, as well as save all receipts, during every trip. By maintaining a proper record of all expenditure, you will save a lot of time for your accounting.
- Remember you are a registered business, so business accounting and taxation laws apply to your Uber working hours.
-
Weekly Payments
Uber has your bank details on your profile, so your income will be transmitted to your bank account on a weekly basis. -
Map Supplementary Functions
The Uber driver app map includes the locations of gas stations and pit stop areas with restrooms for driver convenience. -
Driver Support
There is a support section that allows drivers to contact Uber with issues as well as a notifications area that Uber maintains with all the latest news and local updates to help give you tips on increasing your income.
Rider comments
Use the rating section to hear what people love about their 5-star trips and find out why riders give low ratings so you can decide how to adjust accordingly.